Un paio di settimane fa, stavo guardando dei blogs cercando una idea per qual cosa da fare. Ho deciso di fare questa specie di calendario e ho trovato questo blog che aveva le direzioni. Sembrava abastanza facile, allora ho deciso di farlo!
To start, I headed to Michael's to get my supplies. I left with some Martha Stewart all-purpose paints (FANTASTIC, truly), 3 2"x2" blocks, and some smaller wooden sticks to use for months/days.
Per cominciare, sono andata da Michael's per prendere quello che mi serviva. Sono uscita con della vernice, dei cubi di legno, e poi dei bastoni piccoli di legno per usare per il mese.


At home, since the wood was mostly already sanded, I cut the small sticks into the size I needed (two inches long), and then sanded the edges to get rid of the splinters. Then I started painting (all the colors I used are listed at the bottom). I wore gloves while I was painting and found that it was a great trick because then I didn't care if I touched paint and it made it easier to paint a side if I was holding it down.
A casa, visto che il legno era praticamente gia' fatto, ho solo tagliato i pezzi piccoli nelle misure che mi servivano. Poi ho cominciato a verniciare il legno. Io mi sono messa i guanto perche' non mi volevo sporcare le mani. Poi, ho trovato che facevo meglio visto che potevo toccare il legno piturato visto che avevo i guanti.


Now it was time to decide how to get the numbers and the months onto the wood. The blog where I found the idea used Modge-Podge and then stamps/stickers for the numbers. I wanted mine to be simpler so I bought a set of stencils that had numbers that I liked.
Adesso dovevo decidere come volevo mettere i numeri e poi i mesi sul legno. Il blog dove ho trovato l'idea ha usato un metodo che a me non piaceva molto. Io volevo il mio molto piu' semplice. Allora mi sono comprata dei stencils che avevano i numeri che mi piacevono.


For the months, I had purchased some paint pens, but then once the finish was applied, it smeared. So, keeping it simple, I just painted the months onto the blocks. Looks much more personal!
Per i mesi, avevo comprato queste biro che volevo usare, pero' dopo che c'avevo messo l'affare per finirli, tutto e' venuto via. Allora, ho scritto io i mesi. E' molto piu' personale cosi'!

I used a Satin finish for the entire project. I saw that when I let the finish dry, it stuck to whatever it was drying on. So I found a plastic plate and that seemed to be the easiest way to get the pieces off once dried.
Io ho usato una finitura di Satin. Ho visto che quando si stava asciugando, si attacava su quello che si stava asciugandosi su. Allora ho messo un piatto di plastica sotto e ho fatto molto meglio a togliere tutto!


I then had this idea to make a sort of box to hold the blocks. Once I had the wood cut, it looked super boxy and I didn't like it at all. Plan F (I had many other ideas after Plan A) was one piece of wood and then a half piece for them to rest on. Now it was time to decide how to paint it. Since I loved the beach, I figured a beach theme was perfect. I painted the back with an ocean and palm tree, and then the front I painted a sanddollar (from stencil) and then a sort of white-wash on the edges just with one coat of white paint.
Prima avevo questa idea di creare una specie di contenitore per metterci i cubi. Dopo che il legno era tagliato, sembrava troppo ingombrante. Allora, dopo molte idea, ho deciso di usare solo un pezzo di legno e poi uno a metta. Poi ho deciso di usare il tema del mare per dipingerli. Ho dipinto il mare e una palma di dietro e poi un sanddollar da vanti.


This is what the blocks rest on.

The back.

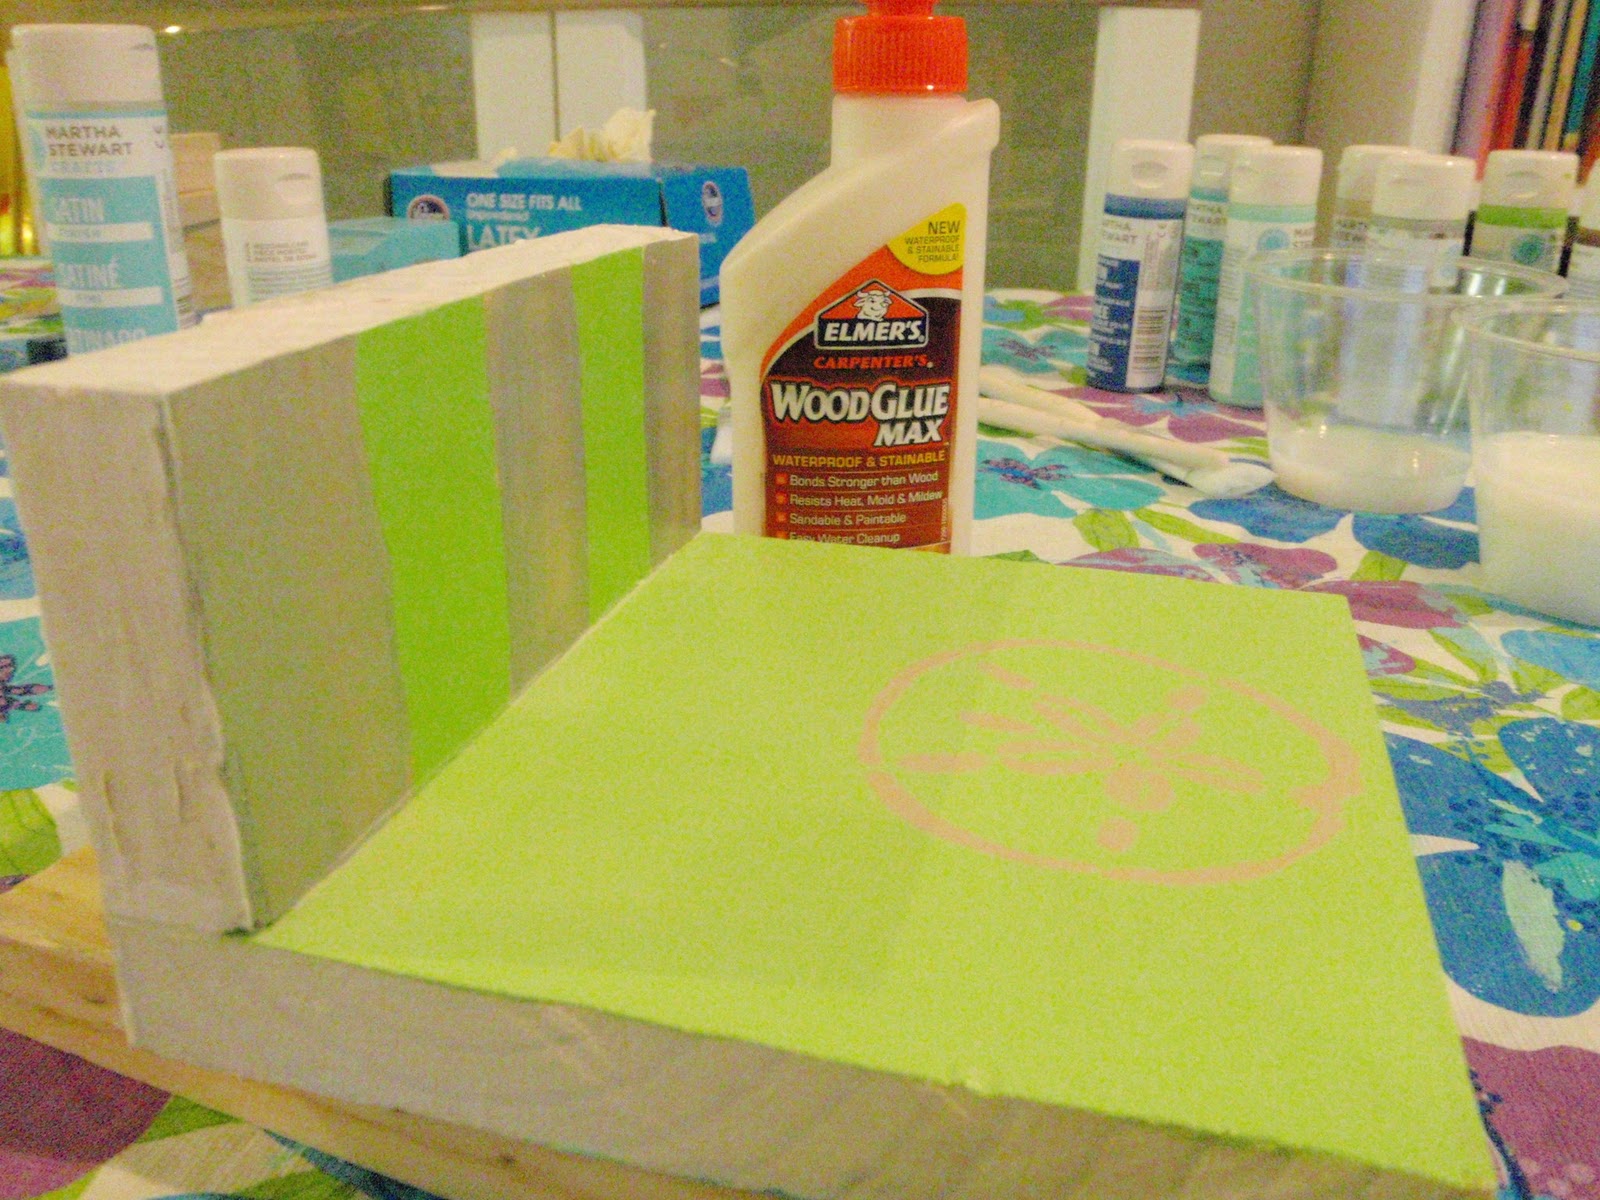
I used wood glue to glue it together.
Now it was complete! I think it turned out pretty fun!
Adesso era finito! Io penso che e' venuto carino!

All the pieces

The front
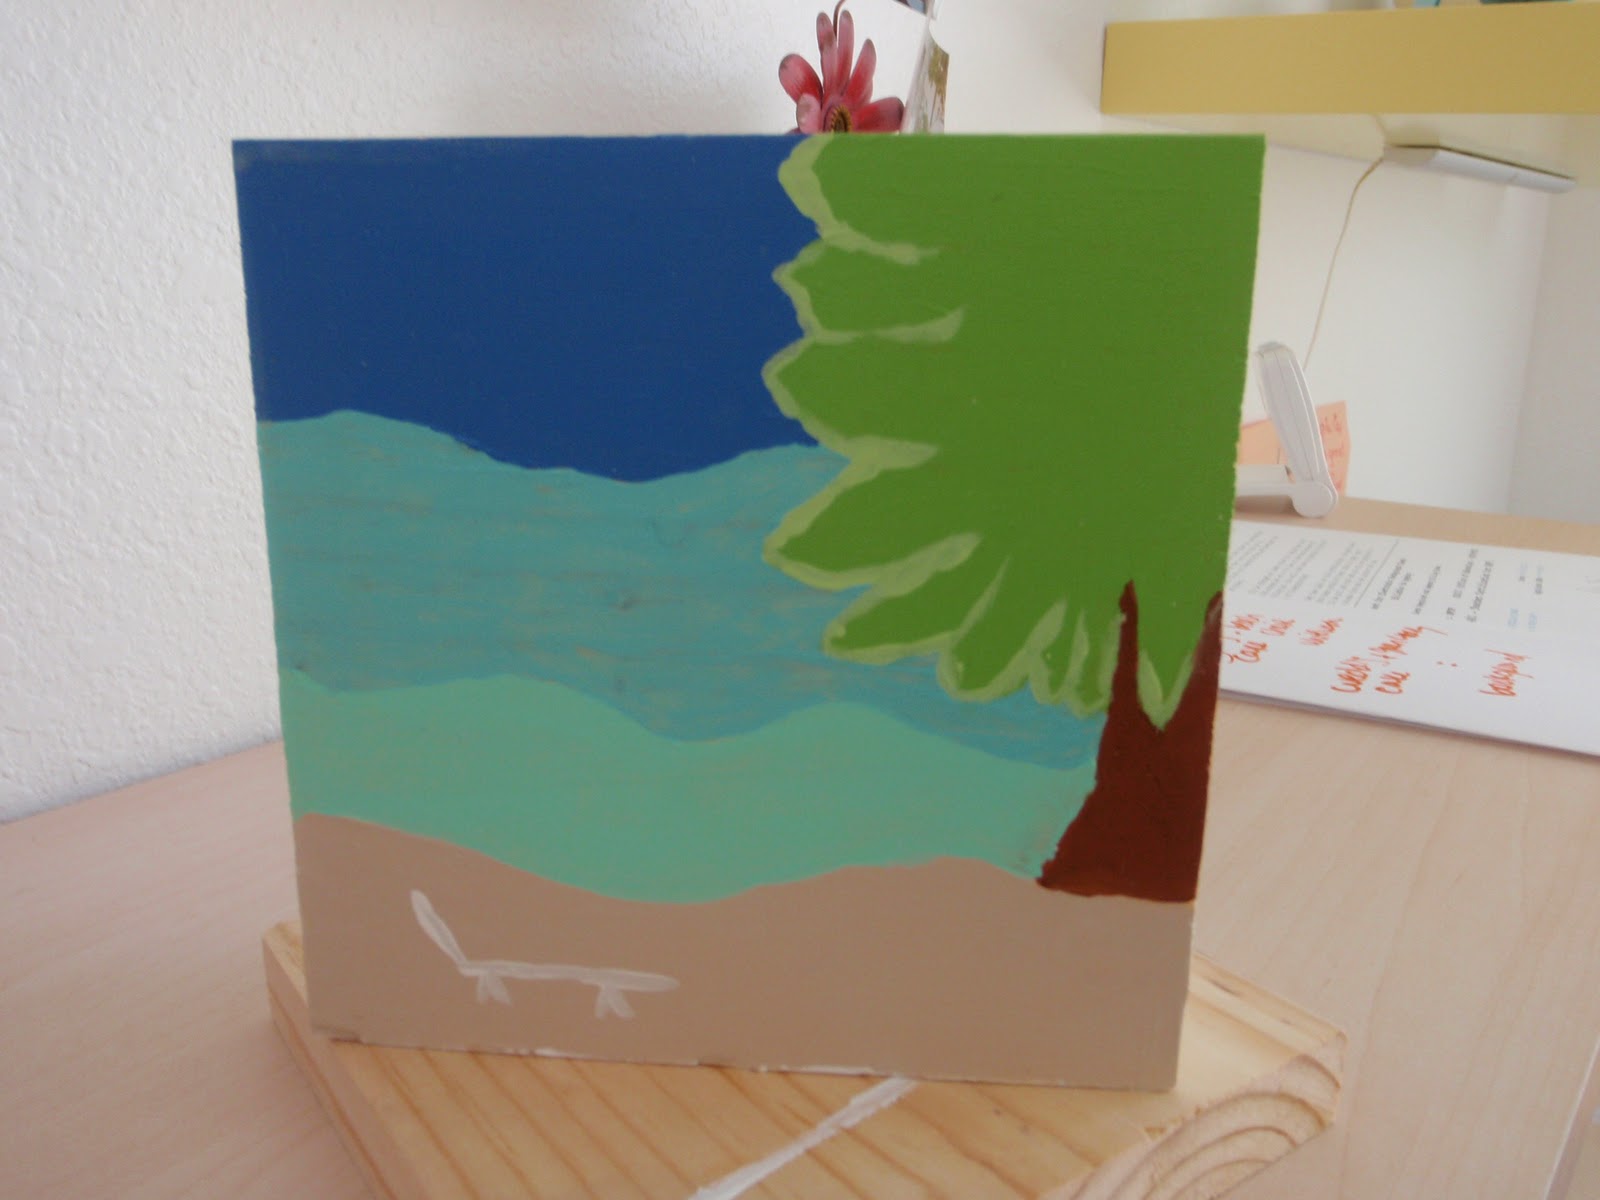
The back

Side
Here are the colors I used (they are all Martha Stewart Satin multi-purpose paints):
Beach Glass - Ocean
Green Curry - Palm Tree; Stripes
Wedding Cake - Beach Chair; White-wash effect
Putty - Sand; Sand Dollar
Chestnut Brown - Palm Tree Trunk
Sterling (Metallic) - Numbers; Months; Stripes
Pool - Base for the number blocks; Ocean
Greek Tile - Month blocks; Ocean
Green Curry + Wedding Cake = Front background
